Zero-threshold walk-in showers, designed and installed by a dedicated in-house crew. Schluter Kerdi waterproofing on every project. Fixed-price quotes and a two-year workmanship warranty.
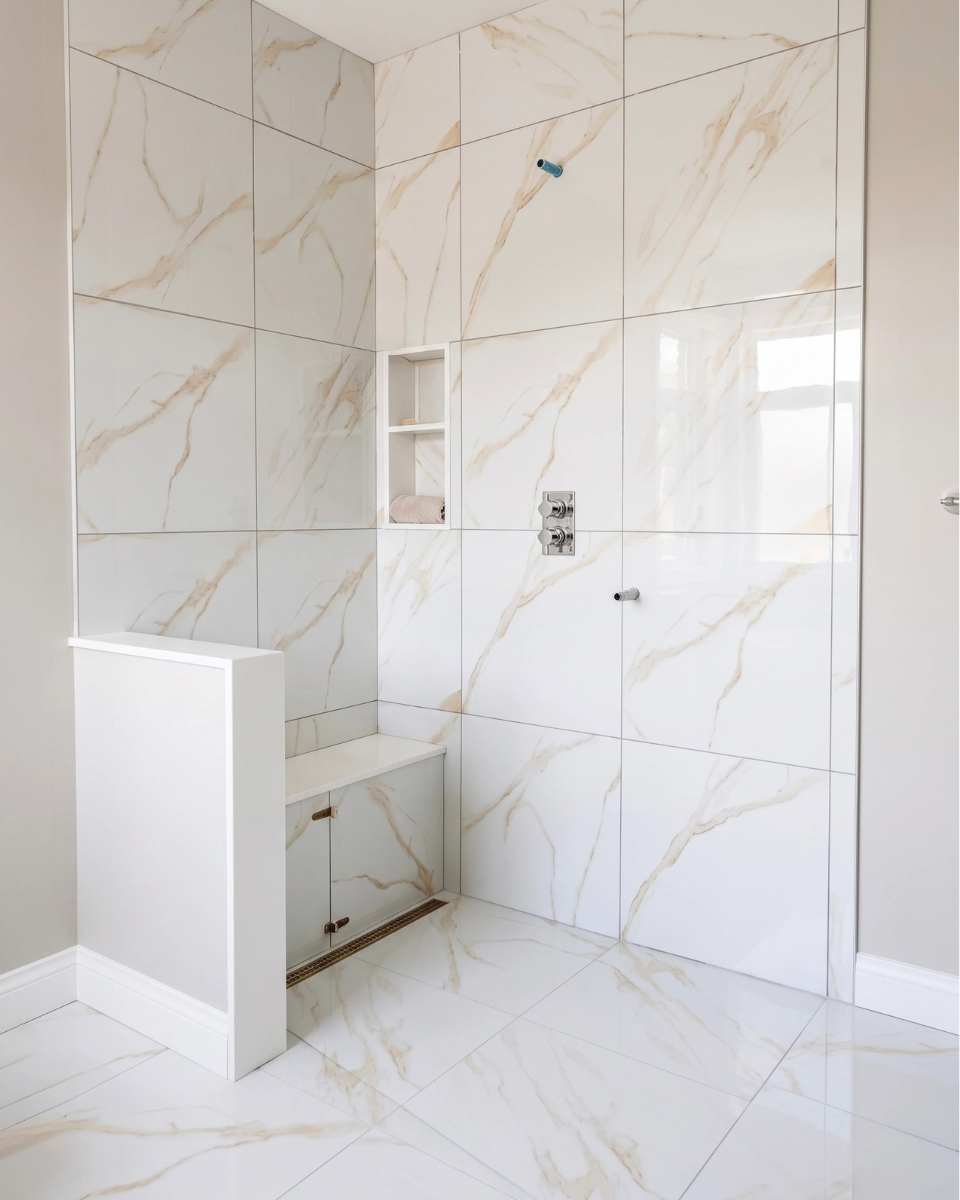
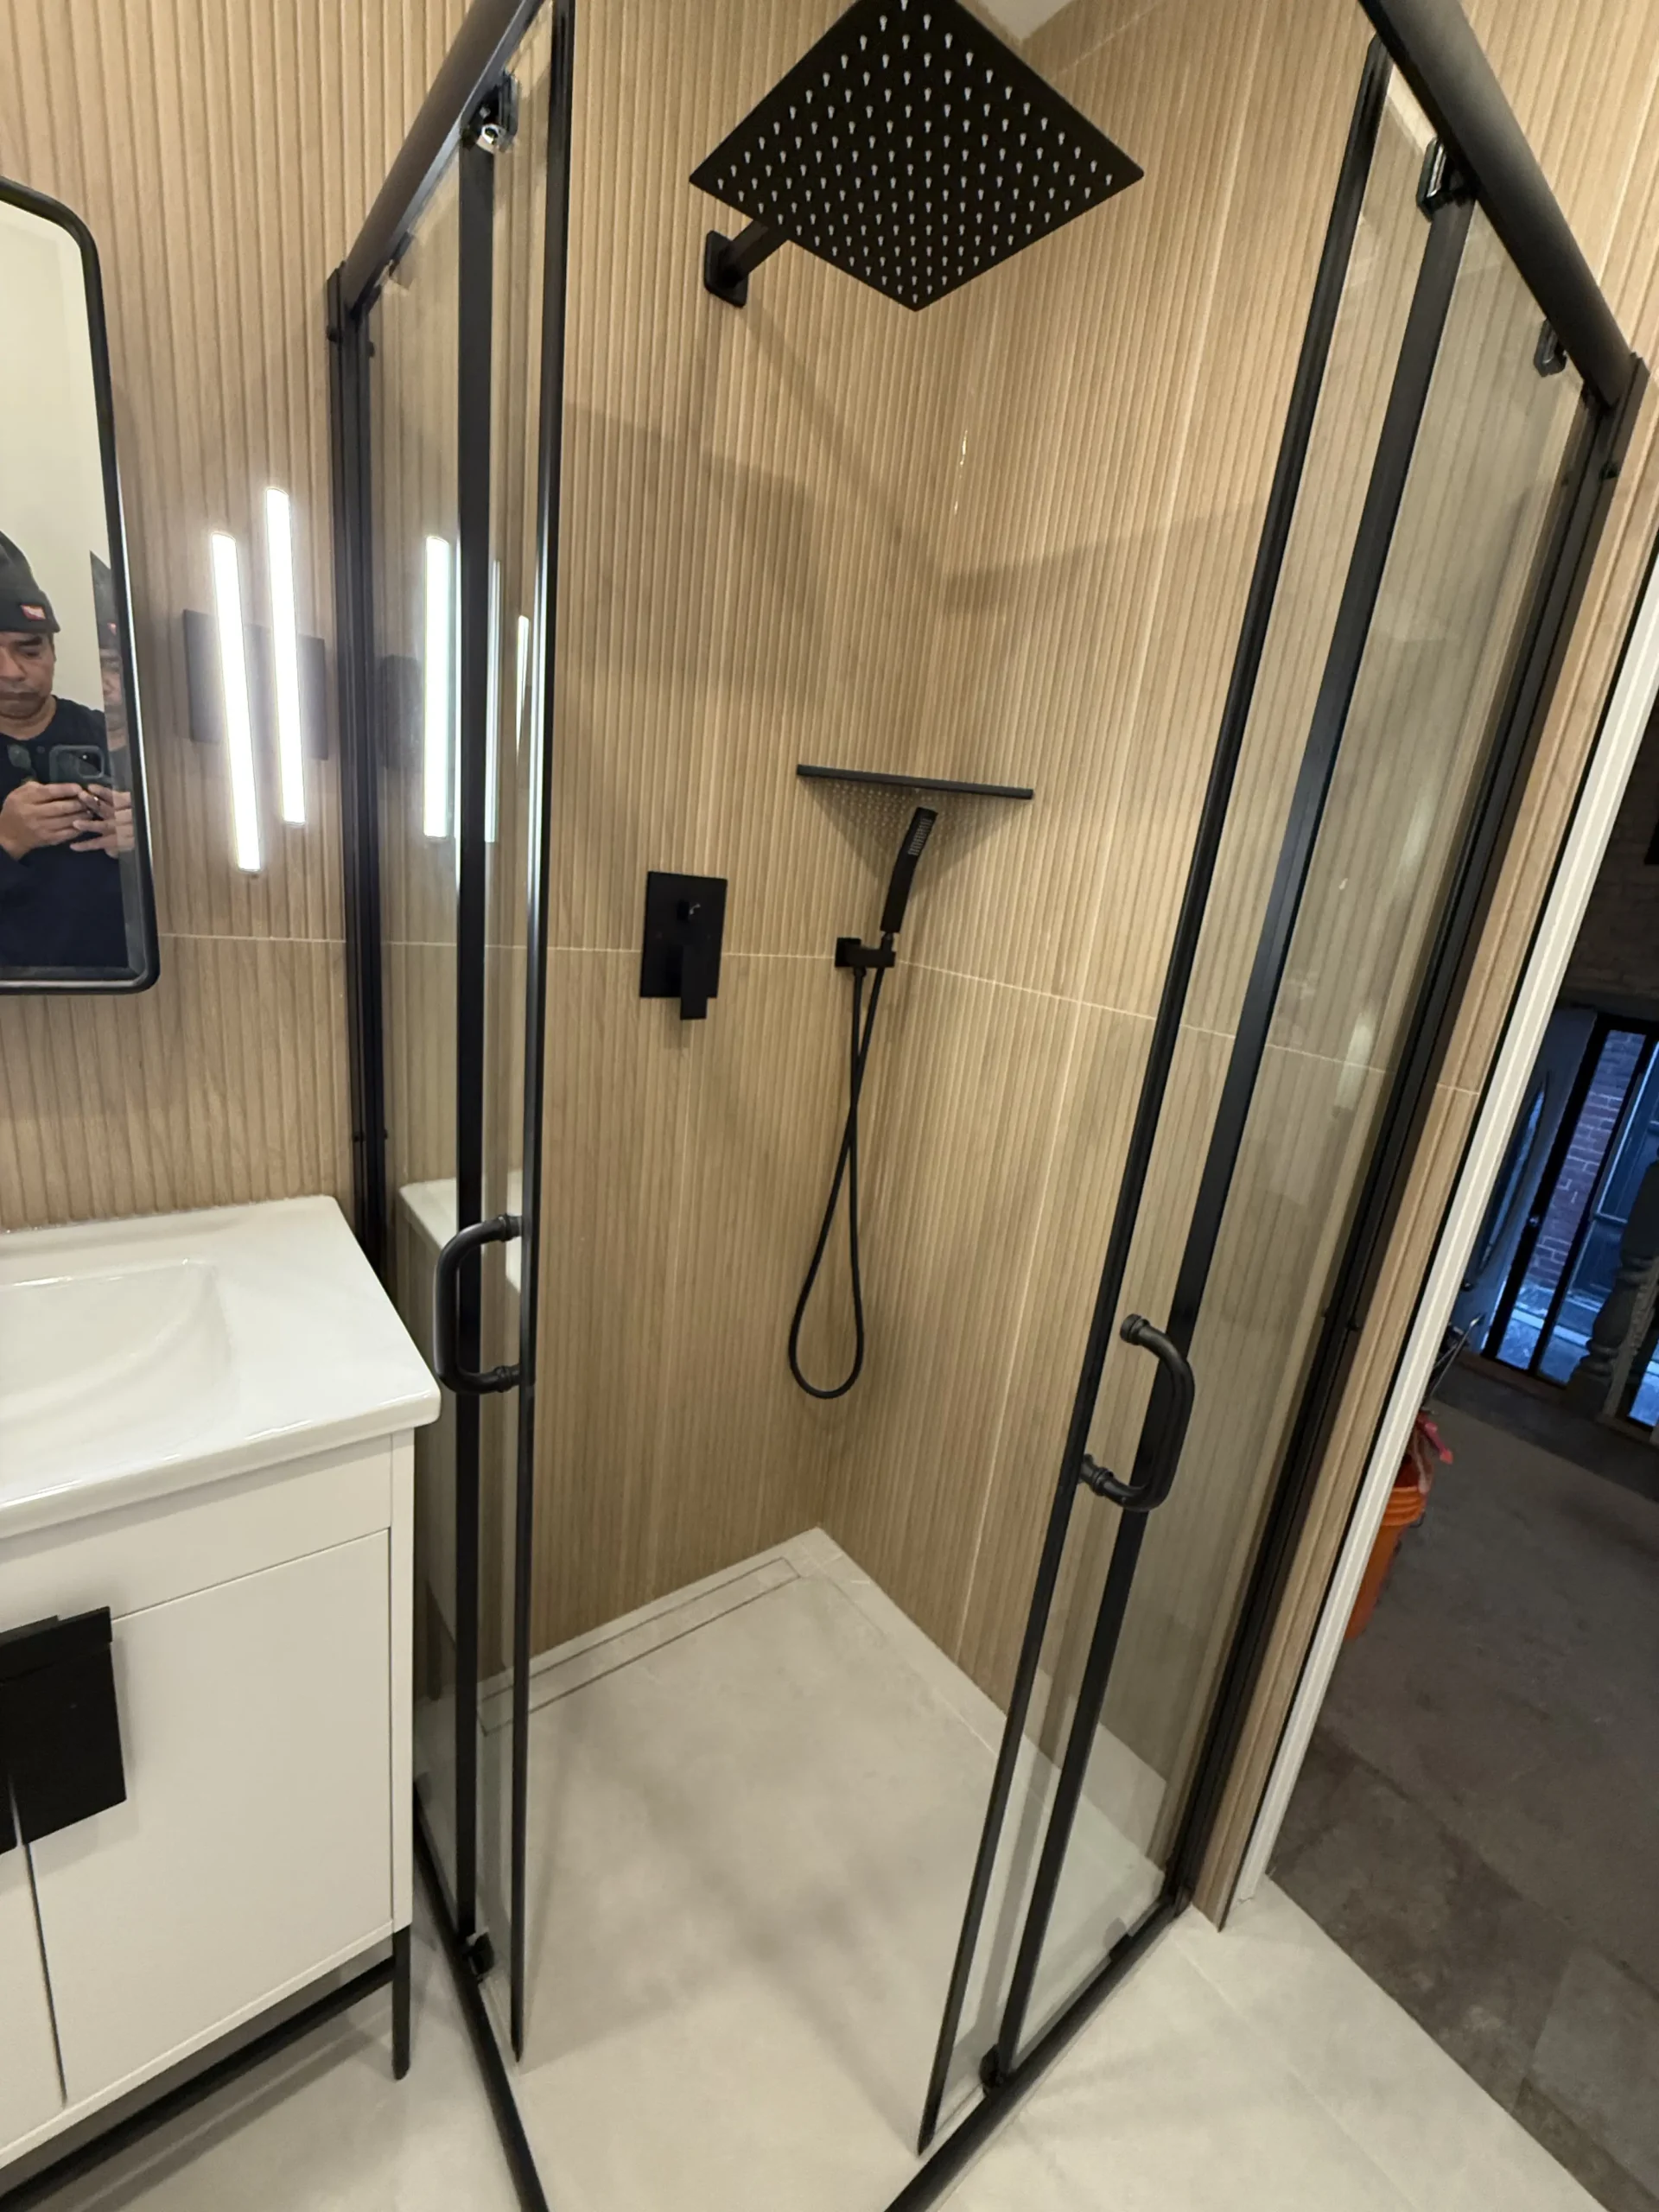
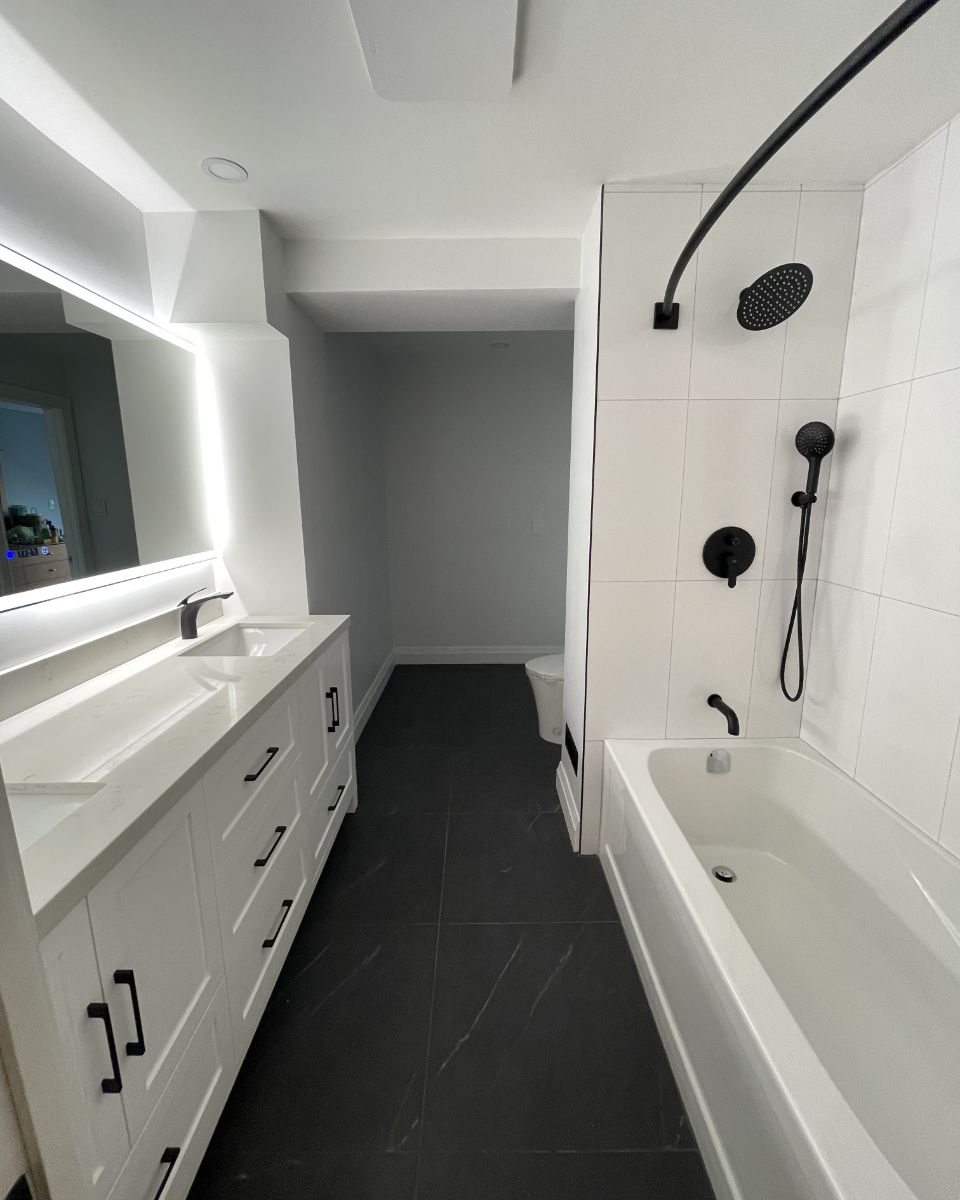
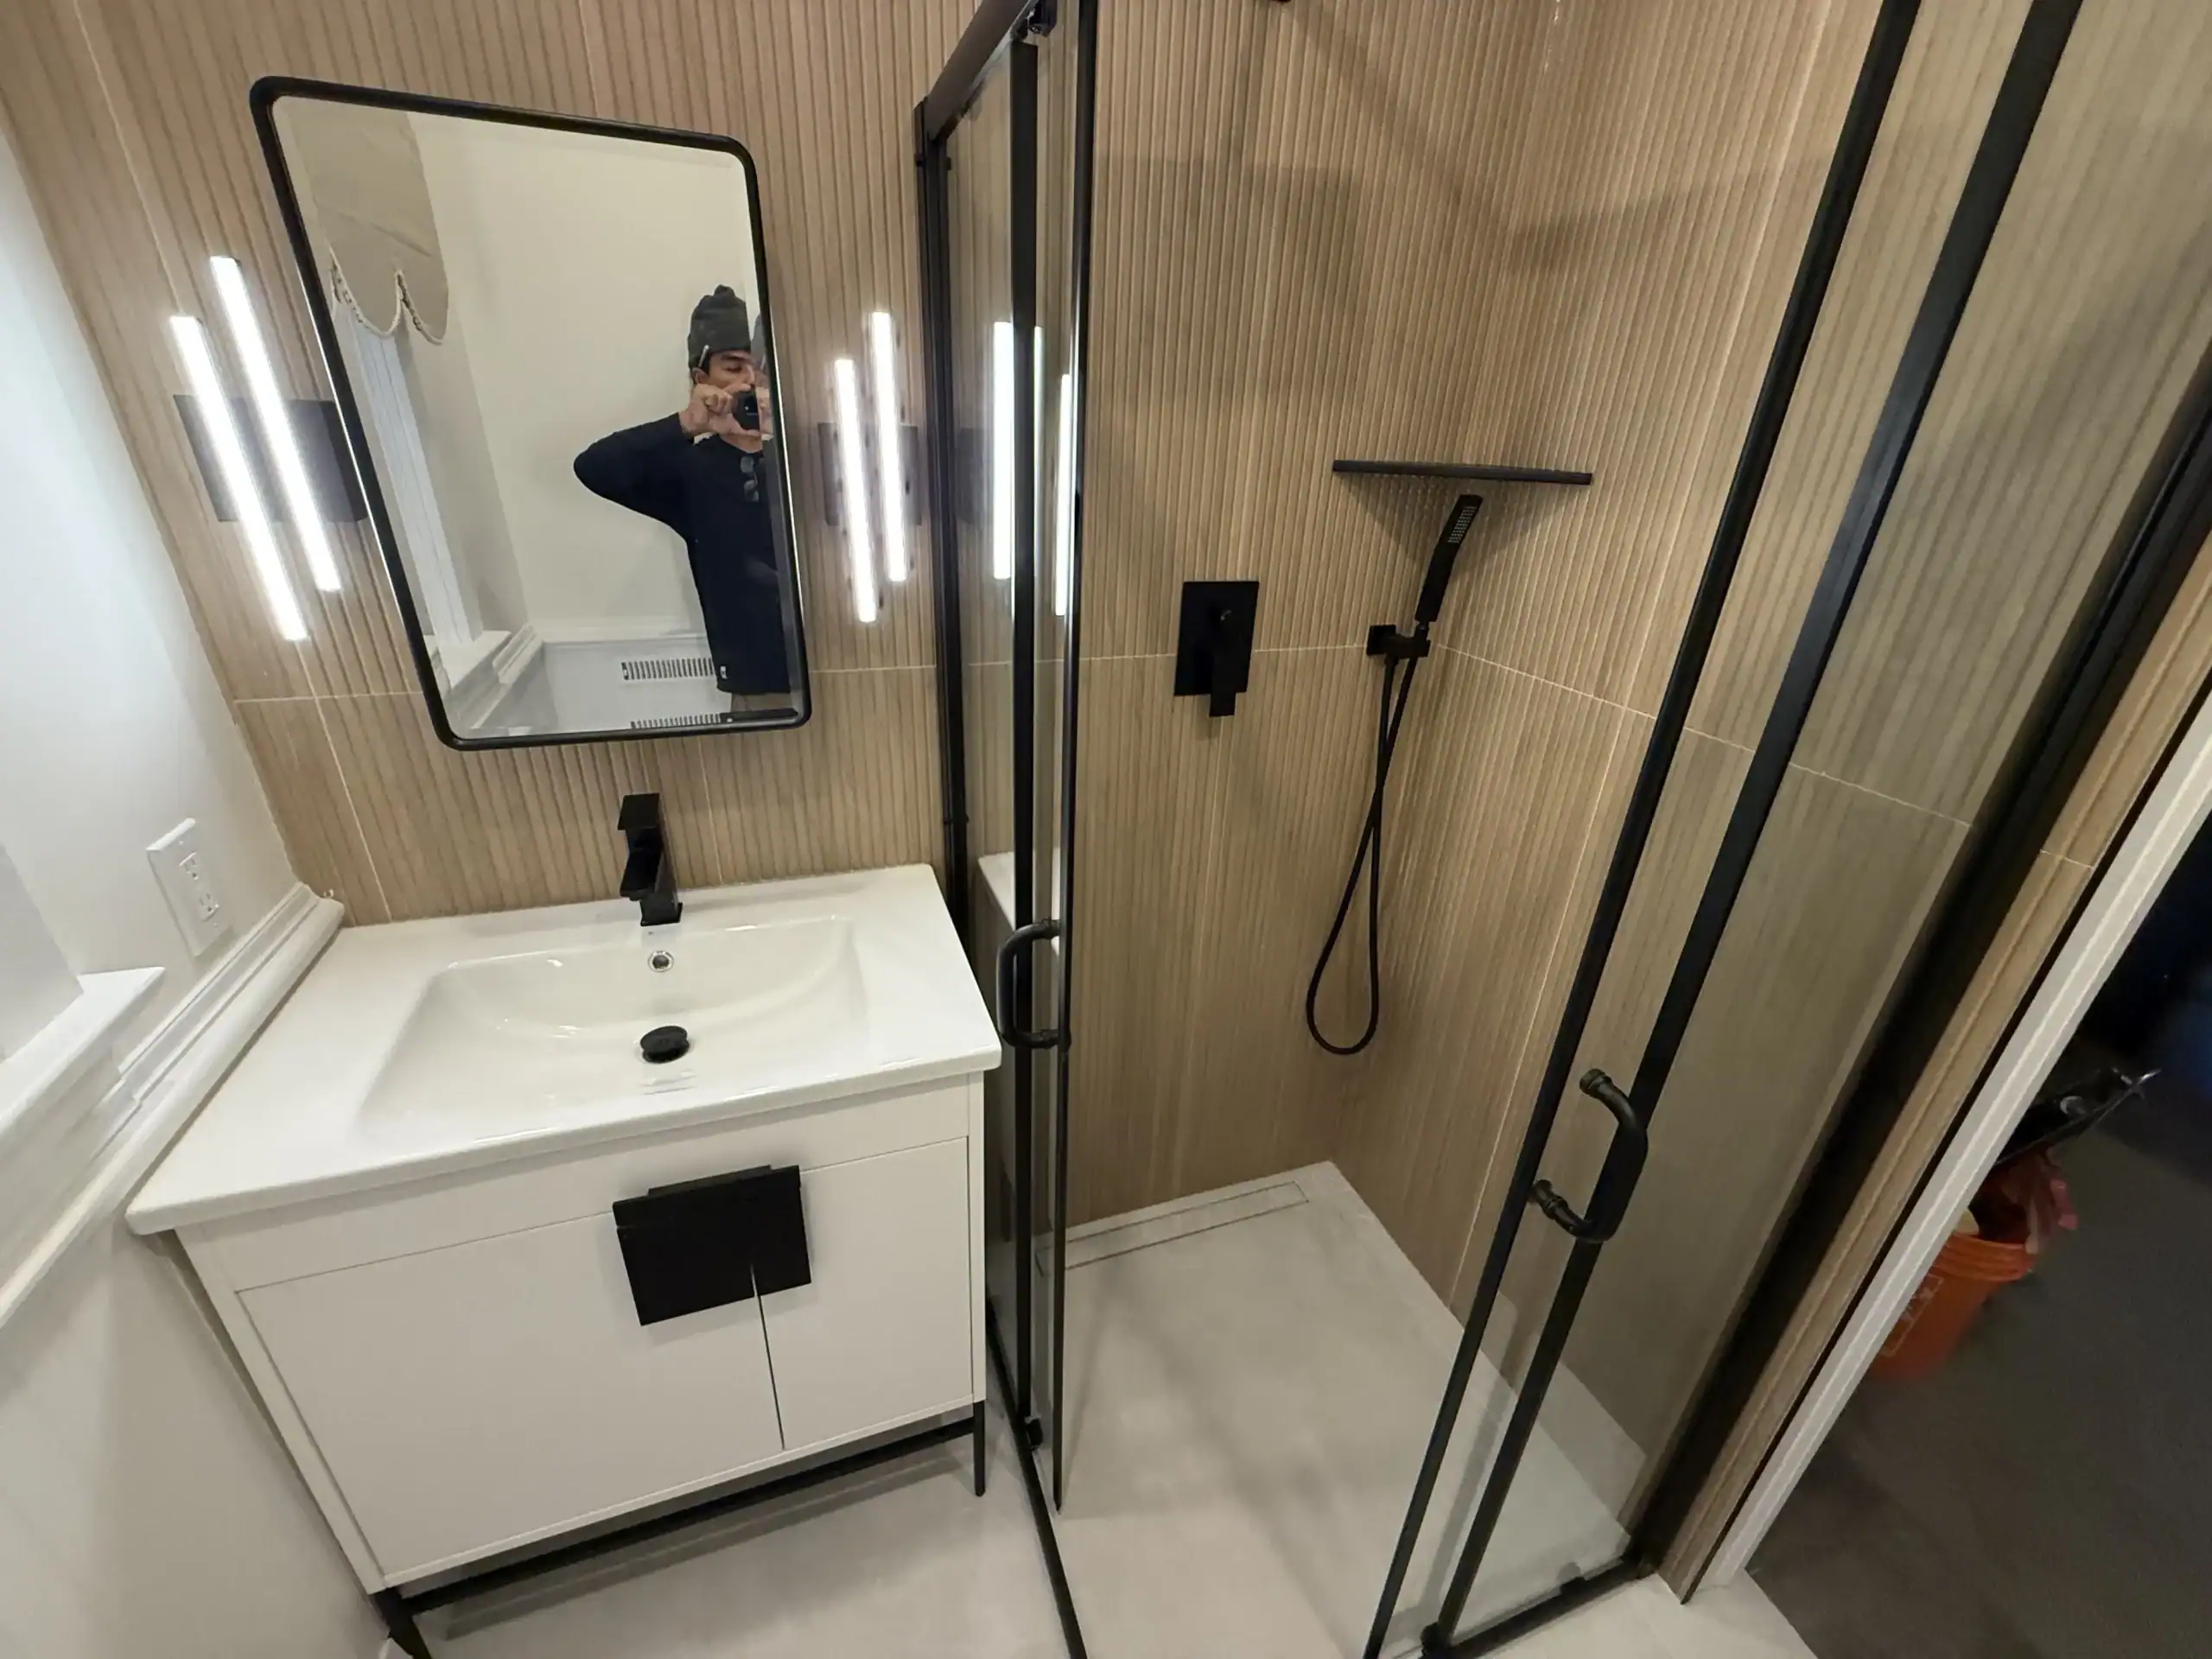
A curbless shower, also called a zero-threshold or barrier-free shower, is a walk-in design with no raised edge at the entrance. The bathroom floor flows continuously into the shower, with a precise slope directing water toward a linear drain.
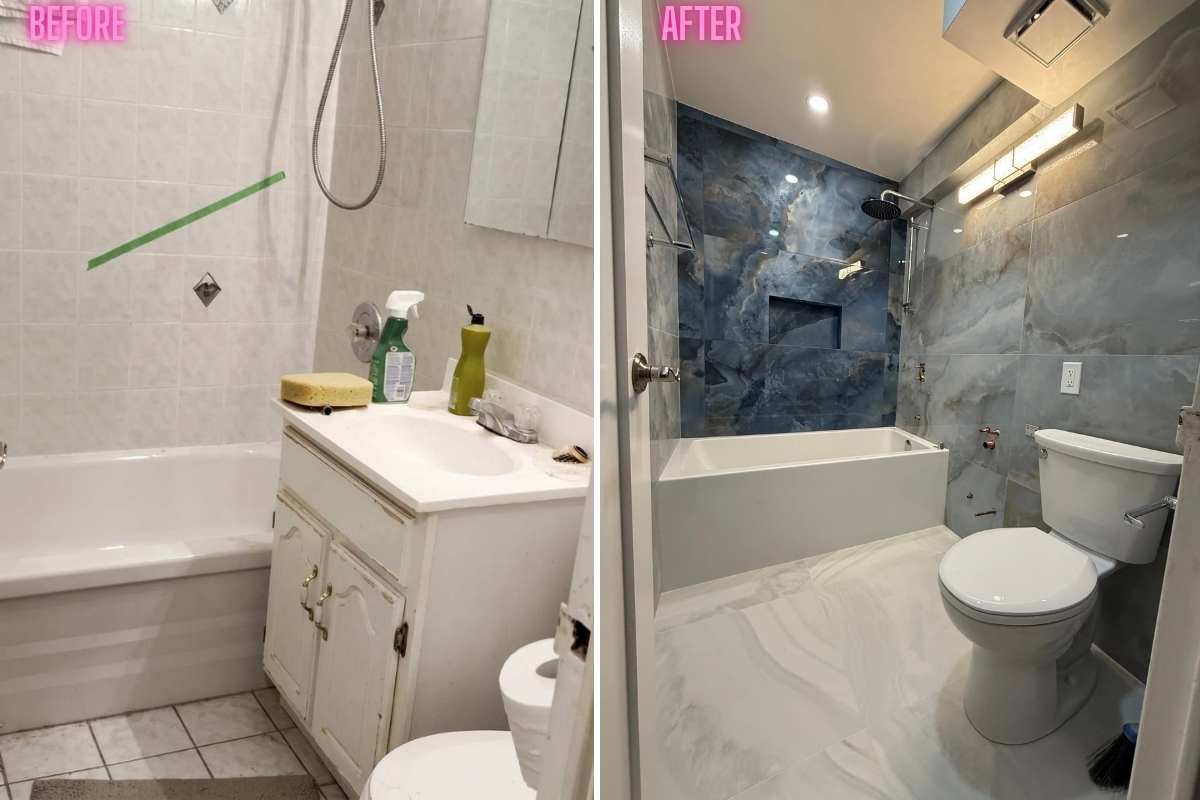
It is one of the most requested features in Toronto bathroom renovations today, valued for its open aesthetic, accessibility, and clean lines. It is also one of the most technically demanding installations in residential construction, which is why the trade behind it matters as much as the design.
At Bathroom Renos, curbless showers are a core part of what we build. Each project is designed in collaboration with the homeowner, constructed by our dedicated in-house crew, and finished to a standard that holds up over decades.
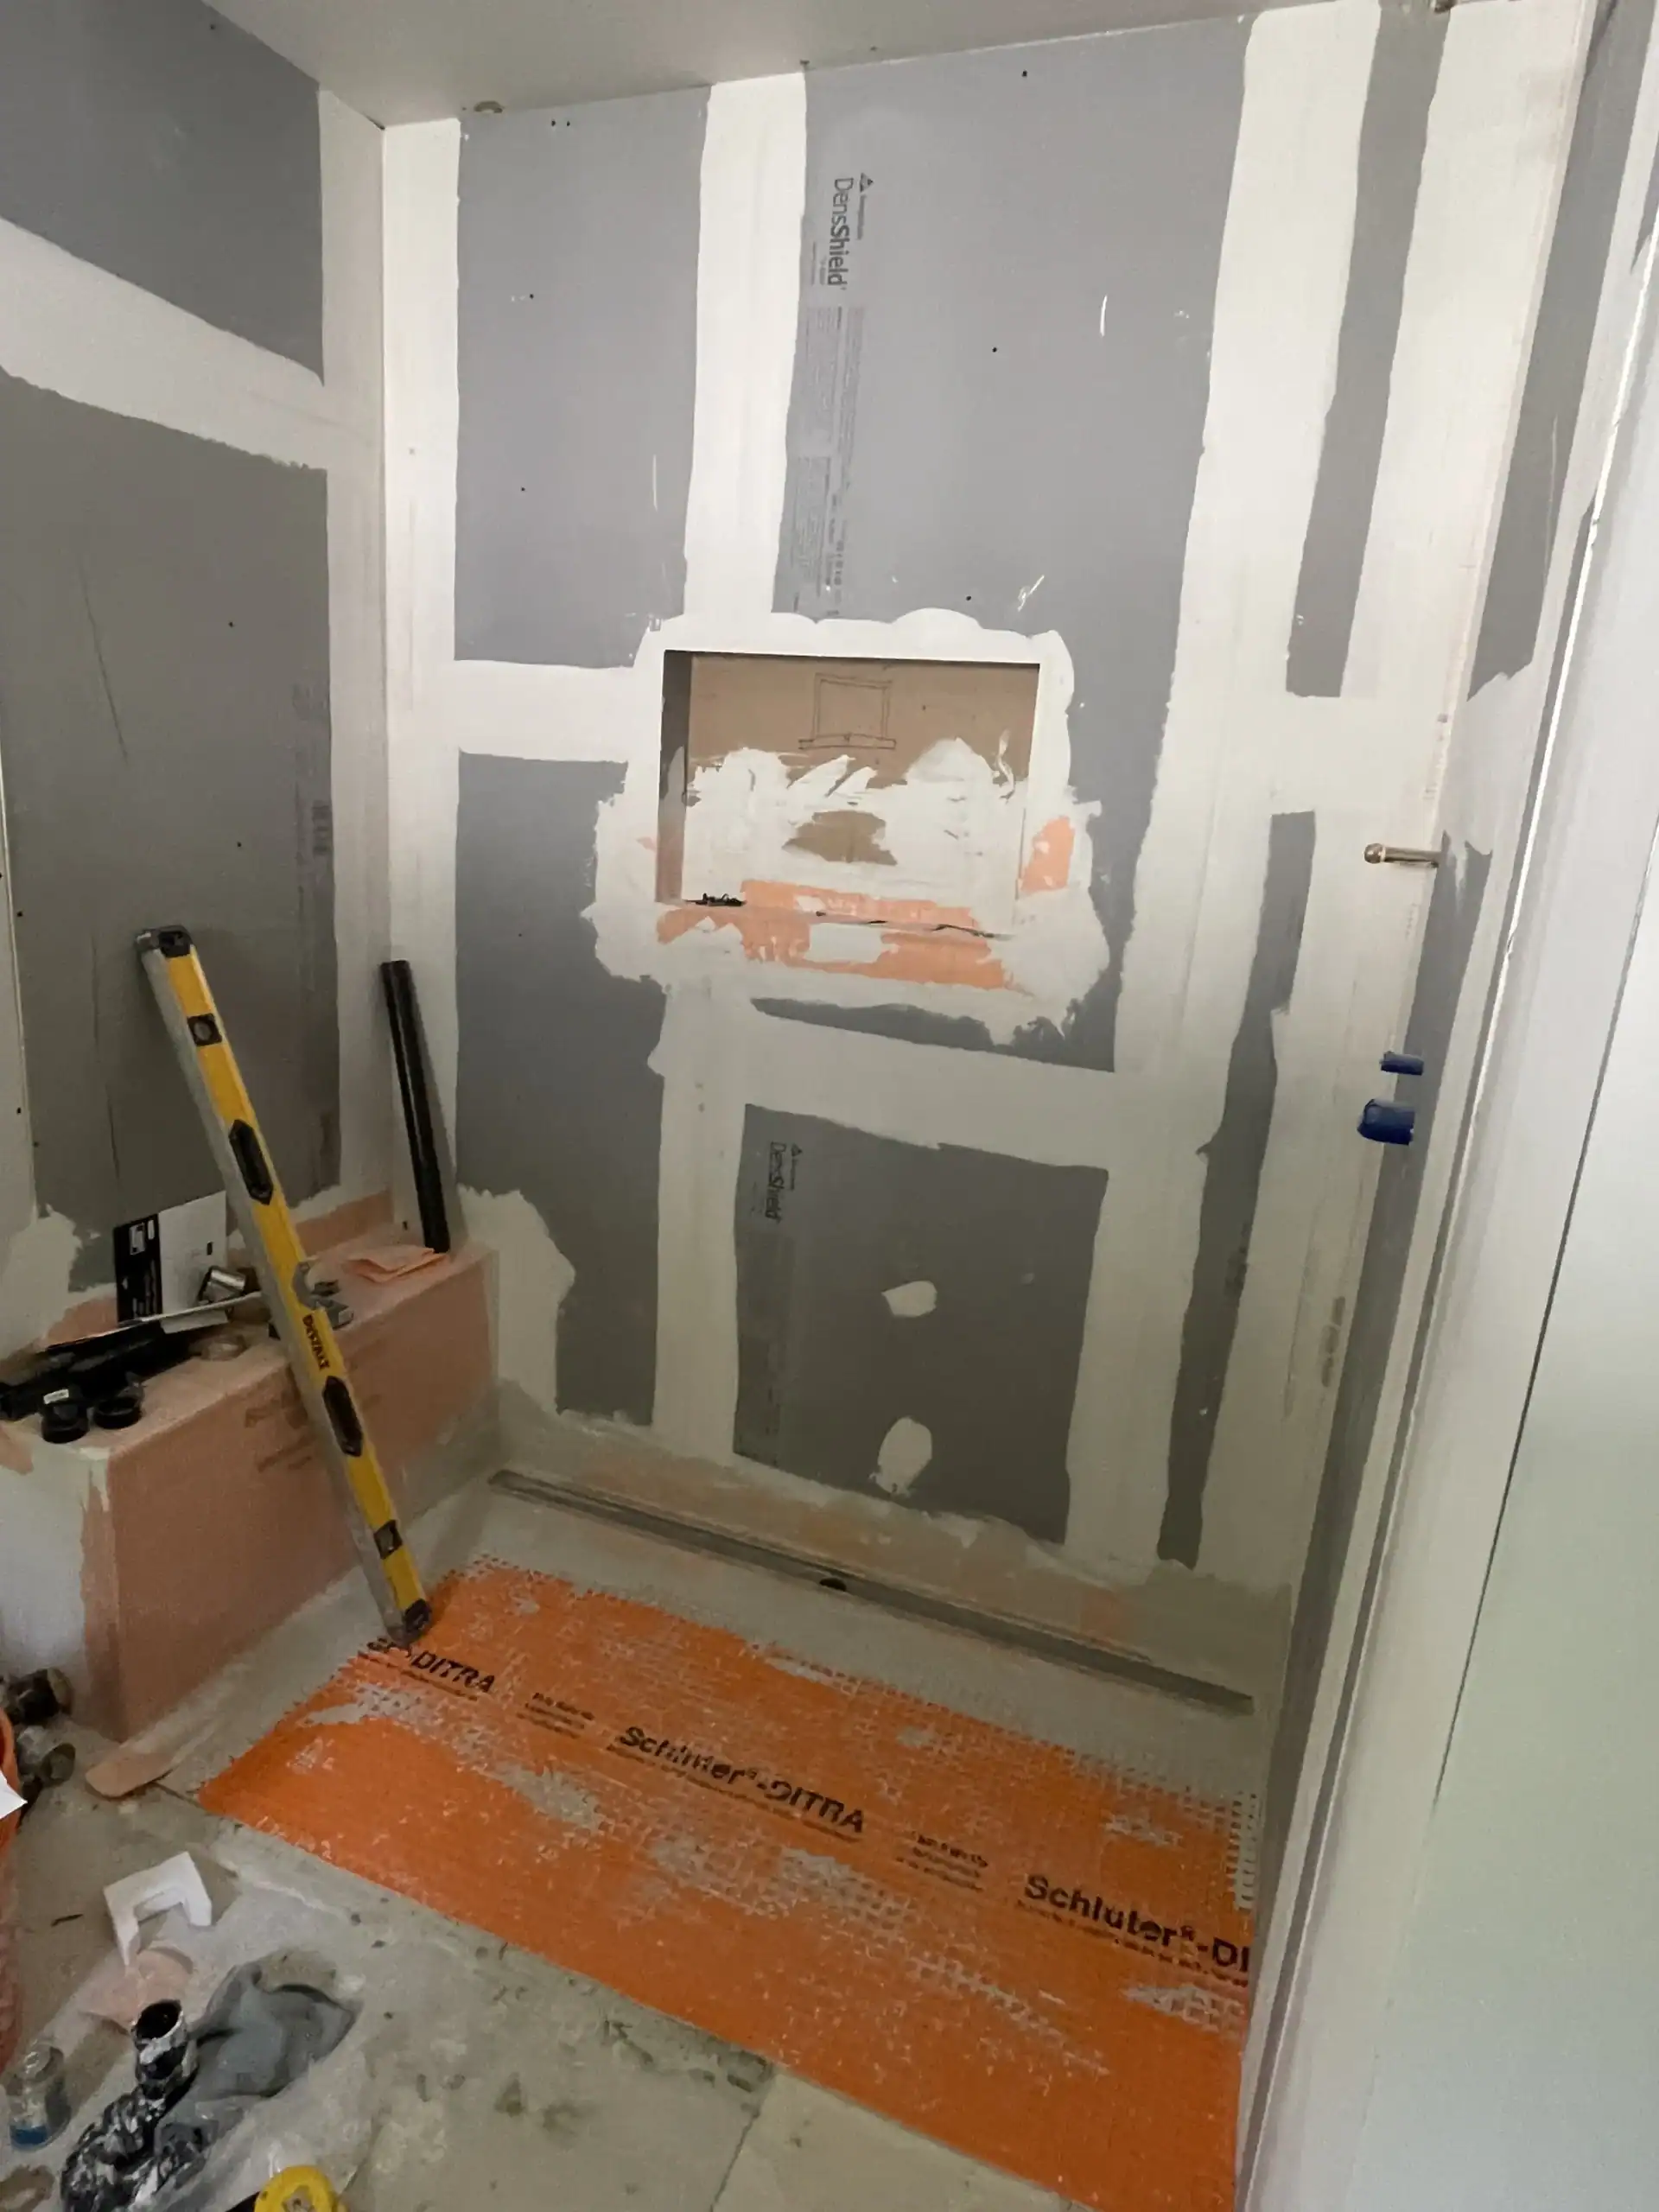
A curbless installation removes the physical barrier between the shower and the rest of the bathroom. Everything that contains water within the shower area is therefore engineered into the assembly itself, beneath the tile. These are the four elements that determine long-term performance.
The shower floor is formed at a minimum of one quarter inch per foot, directing all water toward a single linear drain. Slope accuracy is verified during construction, before any waterproofing is applied.
A bonded waterproof membrane is applied to all shower walls, the shower floor, niches, and benches. Seams, corners, and pipe penetrations are sealed with Kerdi-Band to create one continuous envelope.
Schluter DITRA uncoupling membrane is installed beneath the bathroom floor tile, with DensShield tile backer on the walls. Together these prevent the substrate movement that causes cracked tile and grout over time.
Before tiling begins, the completed waterproofing assembly is filled with water and timed. The system must hold without loss before any tile is set. This step is standard on every project.
Bathroom Renos Inc. has been building bathroom renovations across Toronto, Etobicoke, Mississauga, and Burlington for over twenty years. Every project is carried out by a permanent in-house crew rather than rotating subcontractors.
Every project begins with an in-home consultation, where we measure the space, review the design with the homeowner, and prepare a written fixed-price quote. The same crew then handles the project from demolition through to final walkthrough.
We specialise in bathroom renovations exclusively. Curbless showers, tub-to-shower conversions, condo bathrooms, and full ensuite remodels are the work we do every week.
"They showed up when they said they would, every single day. The shower is better than we imagined. The price didn't change. The crew was the same three guys from day one. That's all we wanted."
S. and M. · Master ensuite, Etobicoke
Every renovation follows the same three-stage process, from first conversation through to completion.
We visit your home, measure the space, and discuss the scope and design with you. A detailed written quote is provided within 48 hours of the visit.
Materials, finishes, and fixtures are selected together. The design and fixed price are confirmed in writing, and a project start date is scheduled.
Demolition, framing, waterproofing, tiling, glass, and fixtures are completed by the in-house crew over two to three working weeks, concluding with a walkthrough.
A selection of recent projects, each built by the same in-house crew and completed within the agreed schedule and fixed price.

Tub-and-shower combo converted to curbless walk-in with built-in bench. 14 working days.
Tub-to-shower conversion with frameless glass and large-format porcelain tile. 12 working days.
Full master ensuite remodel with curbless shower, linear drain, and freestanding tub. 16 working days.
A curbless installation depends as much on the work beneath the tile as on the finishes above it. Each stage below is part of every project we complete.
The shower footprint is recessed between the floor joists to accommodate the slope and waterproofing assembly while keeping the finished floor level with the rest of the bathroom.
The shower floor itself is then formed at a minimum slope of one quarter inch per foot, directing all water toward a single linear drain.

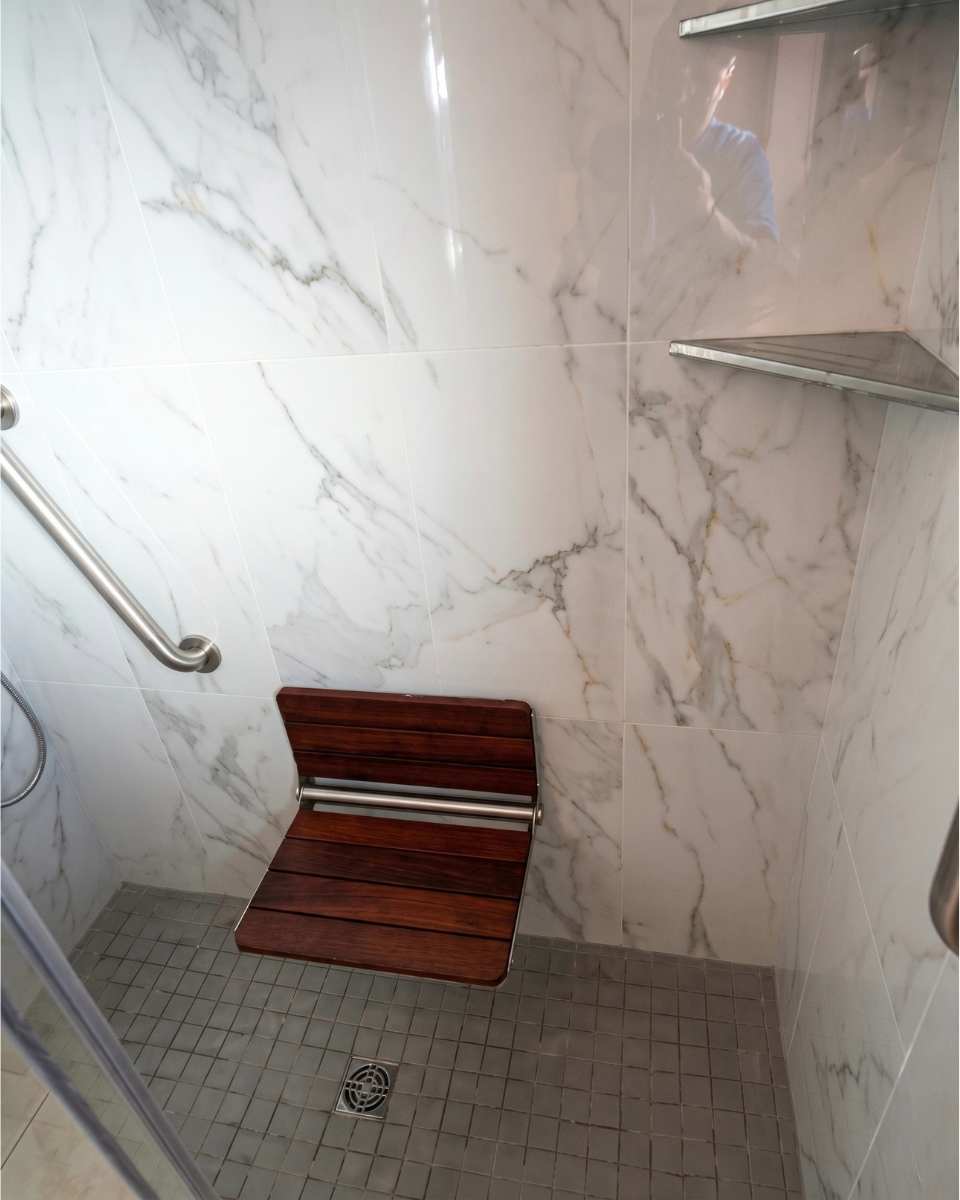
A bonded Kerdi membrane is applied across all shower walls, the shower floor, niches, and built-in benches. Kerdi-Band tape seals every seam, internal and external corner, and pipe penetration.
The result is a continuous waterproof envelope with no exposed substrate beneath the tile. The full system is installed on every curbless shower we build.
Before tile is installed, the drain is plugged and the shower pan is filled with water. The assembly is timed and inspected to confirm that no water is lost through the membrane.
Tiling proceeds only once the waterproofing has passed. This verification step is standard procedure on every project.
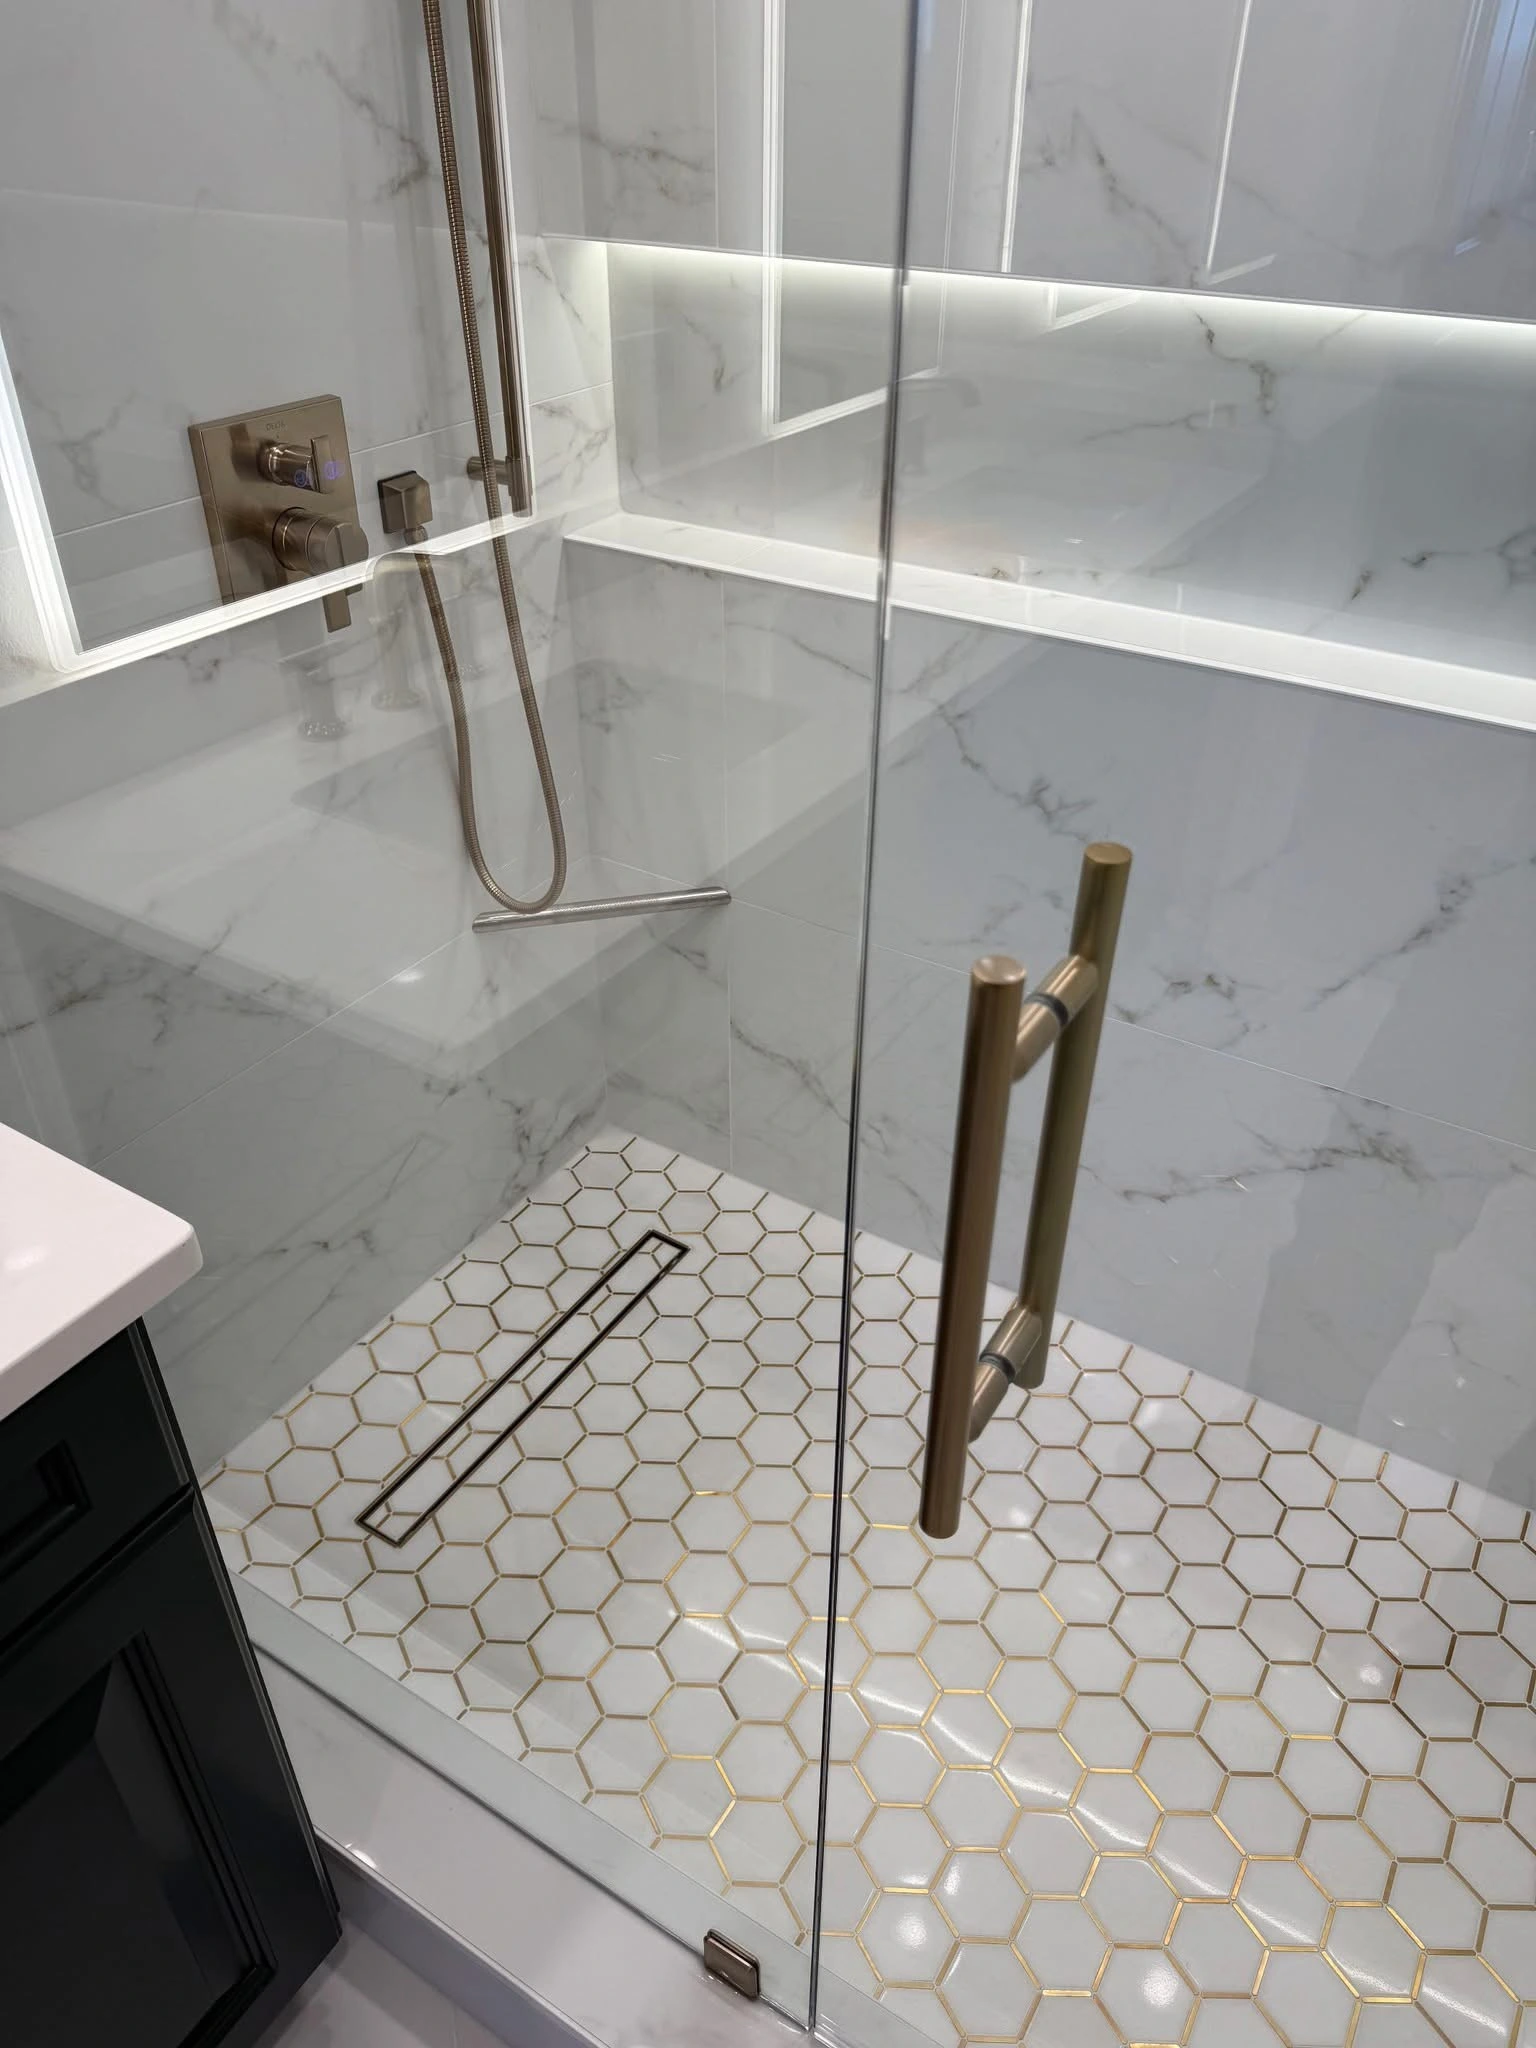
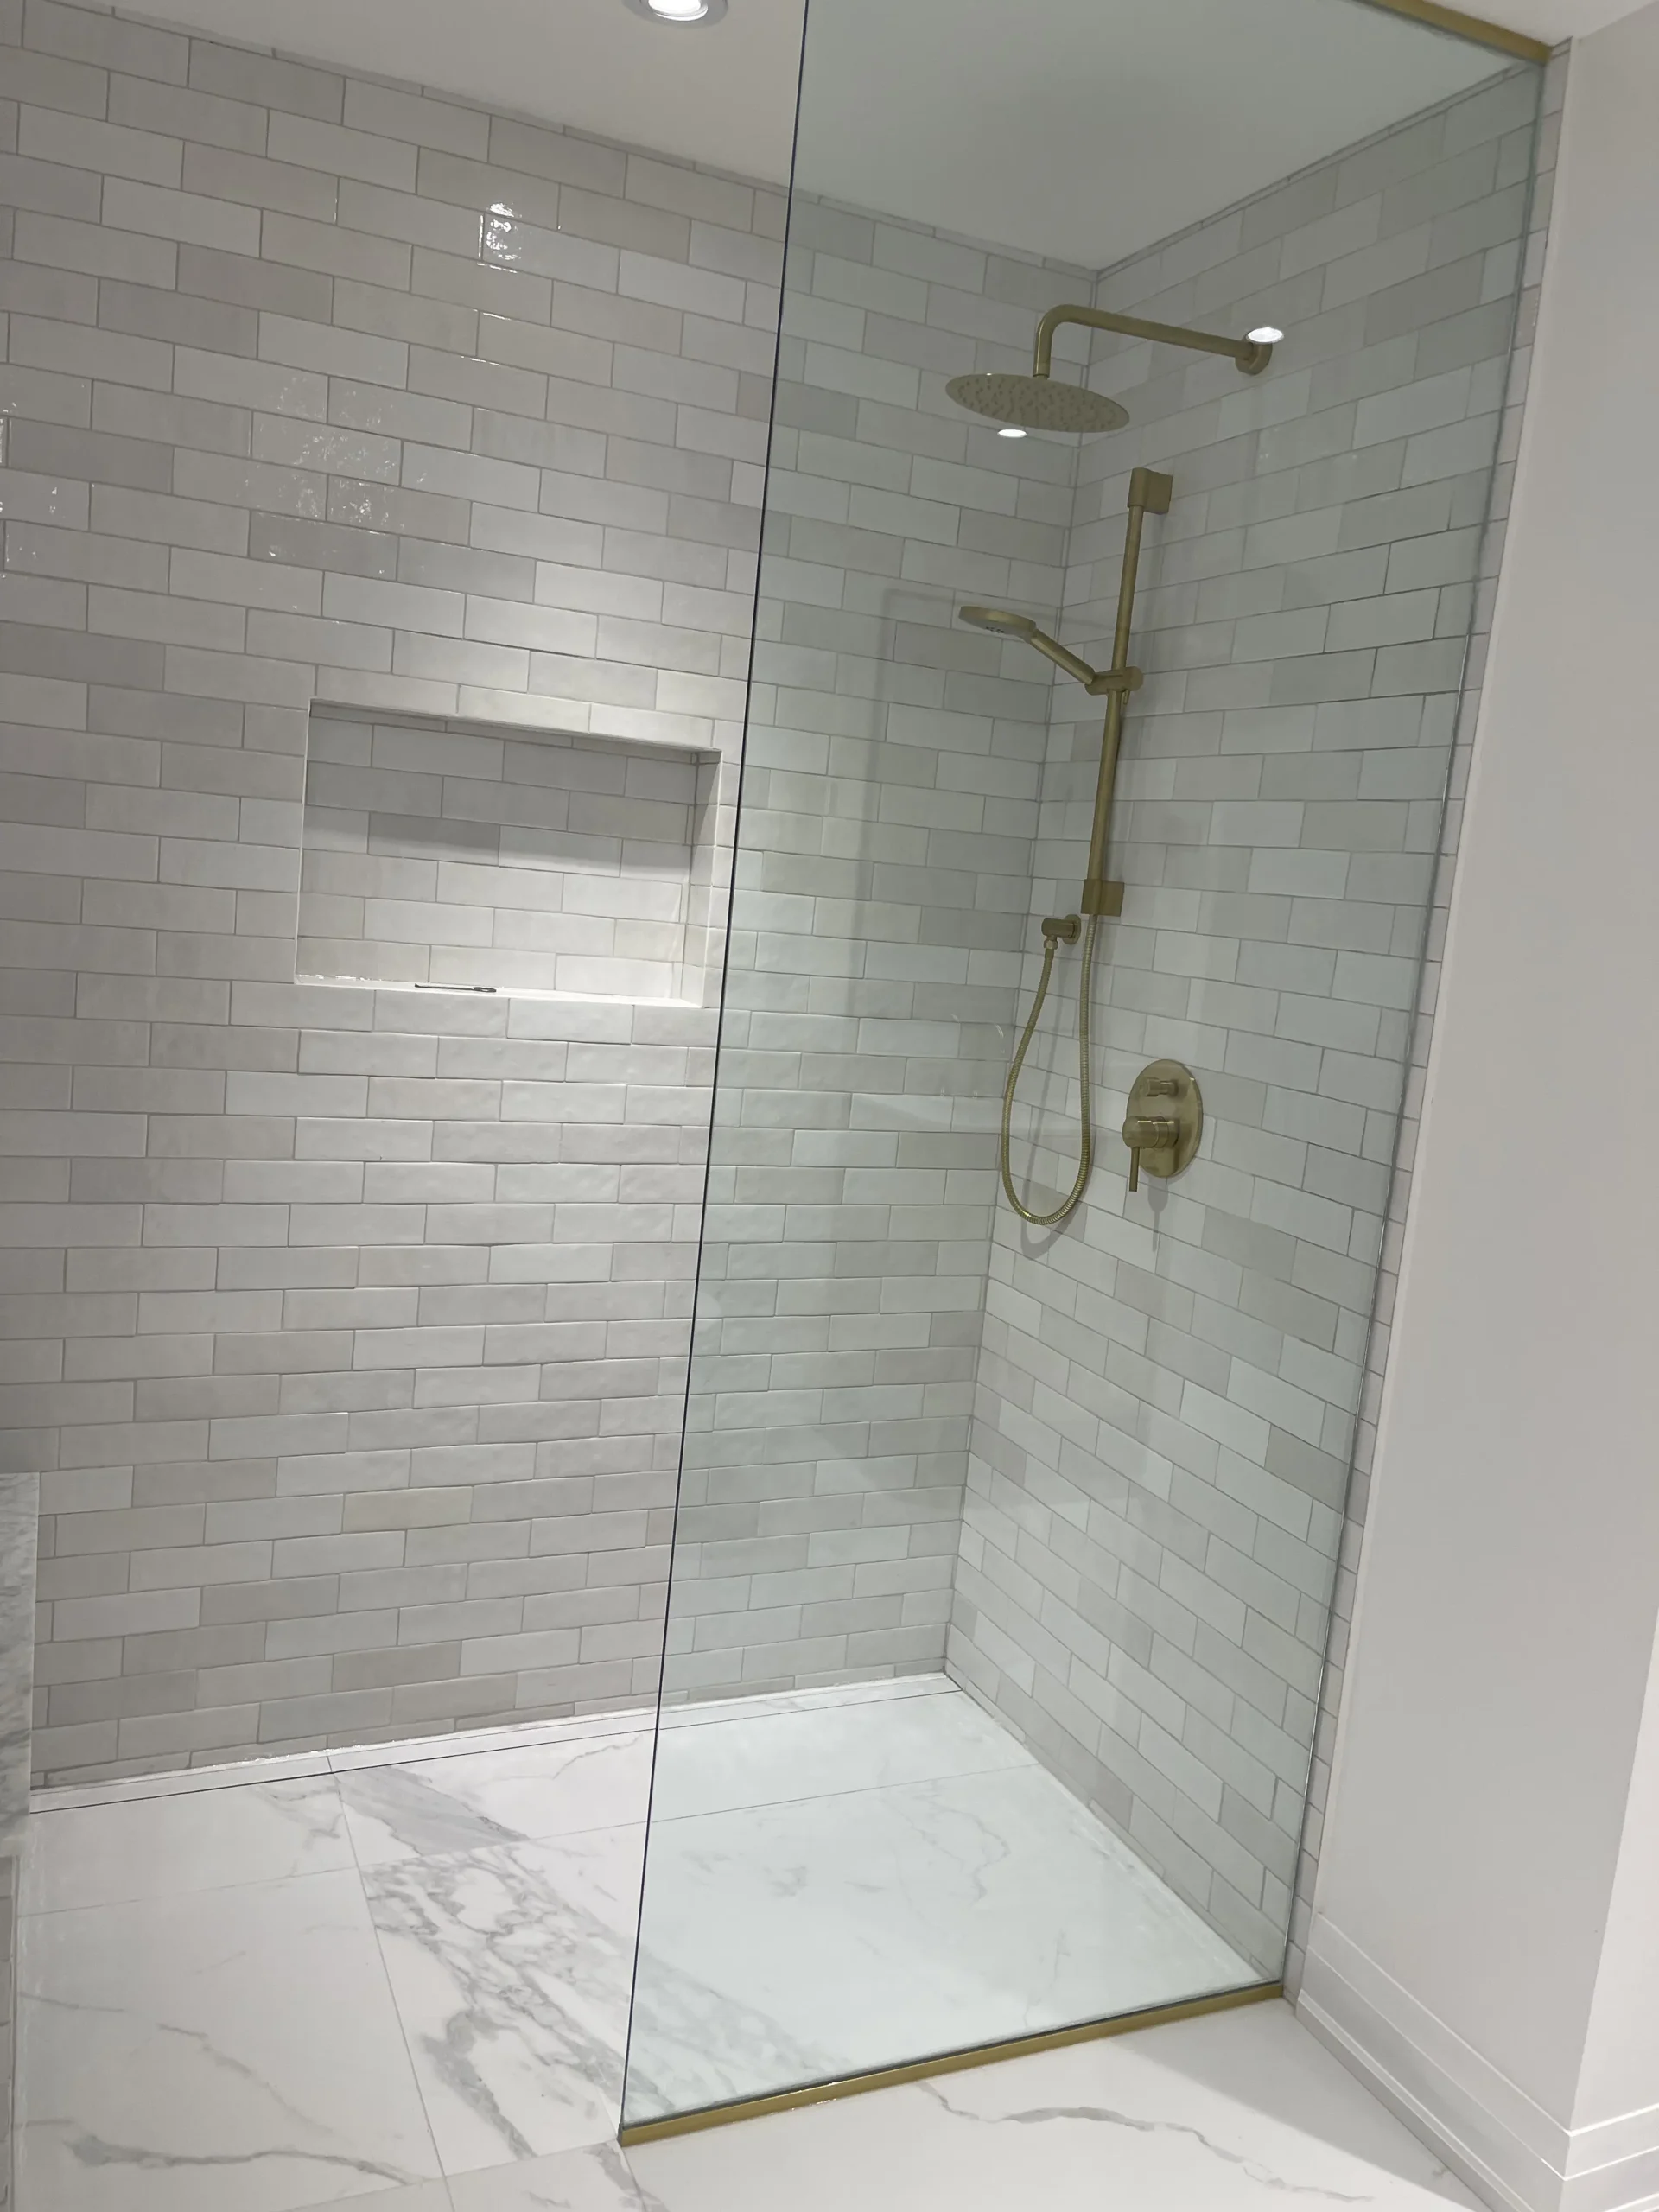
Wall and floor tile is installed with Schluter edge trim, consistent grout joints, and finished corner details. The glass enclosure is measured and fitted, and all fixtures are installed and tested.
The project concludes with a walkthrough and the start of the two-year workmanship warranty.
Every curbless shower installation is delivered under the same standards. The list below summarises what is included on every project.
Tile, drain, glass, fixtures, and lighting selected in collaboration during the design phase, installed to the agreed specification.
Two to three working weeks from demolition to walkthrough. A daily site update is provided throughout the project.
A curbless shower installed to current waterproofing standards is recognised at appraisal and built to last decades without rework.
 Burlington master ensuite — curbless with bench & freestanding tub
Built-in tile bench, Burlington
Burlington master ensuite — curbless with bench & freestanding tub
Built-in tile bench, Burlington
 Spears Ave, Toronto — 3-piece master
 Subway tile classic, frameless glass
 Small space, fluted tile, opens the room
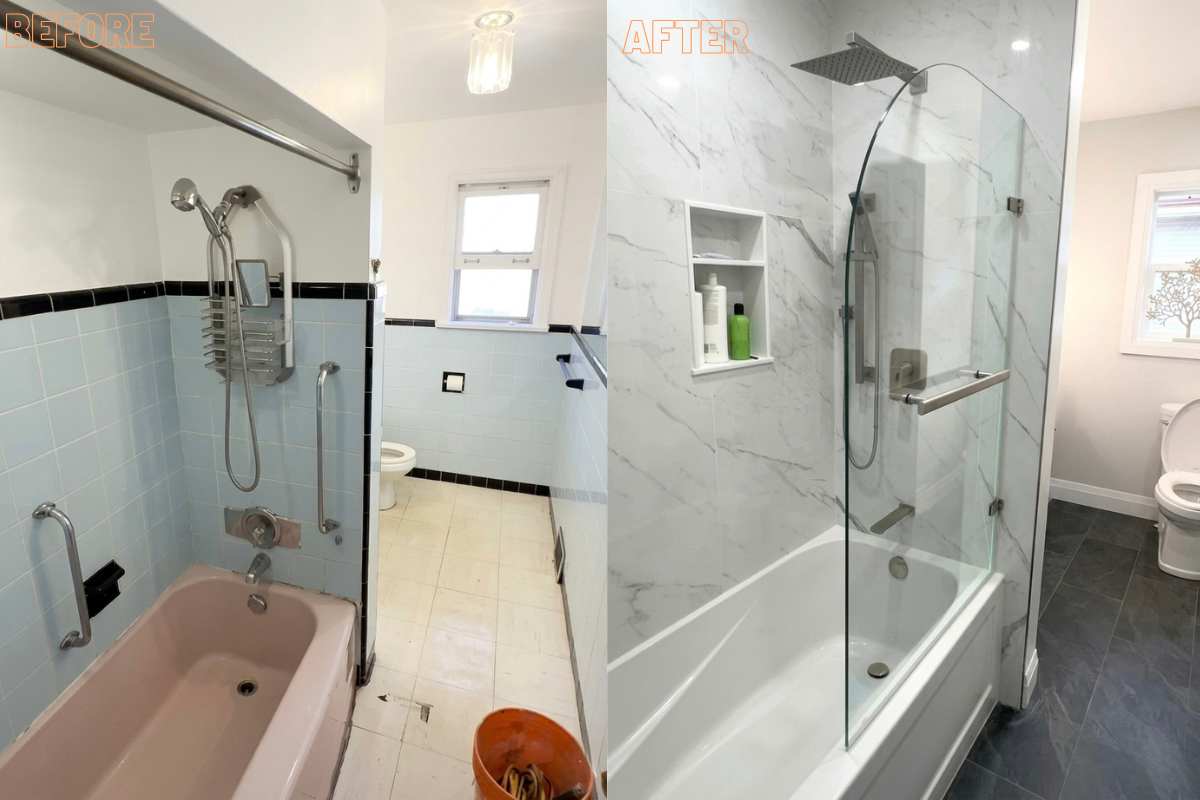
 Etobicoke tub-to-curbless conversion
Curbless shower installations in Toronto typically start at $13,000 and range up to $22,000+ depending on size, tile, drain, and glass enclosure. The extra cost over a curbed shower comes from the precision slope work, linear drain, and expanded waterproofing required for a zero-threshold design. You'll get a fixed-price quote in writing after your in-home consultation. No surprises during the build.
Yes, when it's built correctly. The shower floor slopes a minimum of 1/4" per foot toward a linear drain, and the glass enclosure is positioned to contain spray. We flood-test every installation before any tile goes down to confirm the waterproofing holds. Every curbless shower we build is also covered by our 2-year workmanship warranty.
7 to 14 working days from demolition to final walkthrough, depending on the scope. Our dedicated in-house crew stays on your project start to finish, so there are no delays from jumping between jobs. You'll receive a written timeline before we start, and a daily check-in throughout the build so you always know what's happening.
In most Toronto condos, a true curbless shower isn't possible. Condo buildings use concrete slab floors and most condo boards prohibit cutting into them, since the slab is shared with the unit below. What we can do is build a modern low-curb walk-in shower (as low as 2 inches) using the same Schluter Kerdi waterproofing and frameless glass. The finished look feels open and contemporary without compromising your building.
It can happen in older GTA homes. If we encounter rotted subfloor, dated plumbing, or hidden water damage during demolition, we pause the work, document the condition with photographs, and present a written cost and revised timeline for your approval. Nothing is added to your invoice without that conversation.
Our 2-year workmanship warranty covers everything we install: waterproofing, tile, fixtures, glass, and finish work. If something fails because of how it was built, we come back and make it right at no cost to you. We're WSIB certified and fully insured. The warranty is in writing, on your contract, before you sign.
To begin a curbless shower project, request an in-home consultation. We will measure your space, discuss the design with you, and provide a written fixed-price quote within 48 hours.
Toronto · Etobicoke · Mississauga · The Beaches · North York · East York · Burlington · Oakville · Bloor West Village · Swansea · Roncesvalles